


If you want to develop your own, I have a set of Do it yourself mounting shelf ideas and a areas record, which include anything I made use of:
1st, I commenced off by building the key system of the mounting shelf. It consists of a piece of plywood with a 2×4 attached to the backside of it. On this 2×4, I hooked up some hooks. Then, in the 4 corners, I hooked up some garage door rollers. These rollers are seriously adaptable and were vital in producing this venture function. 
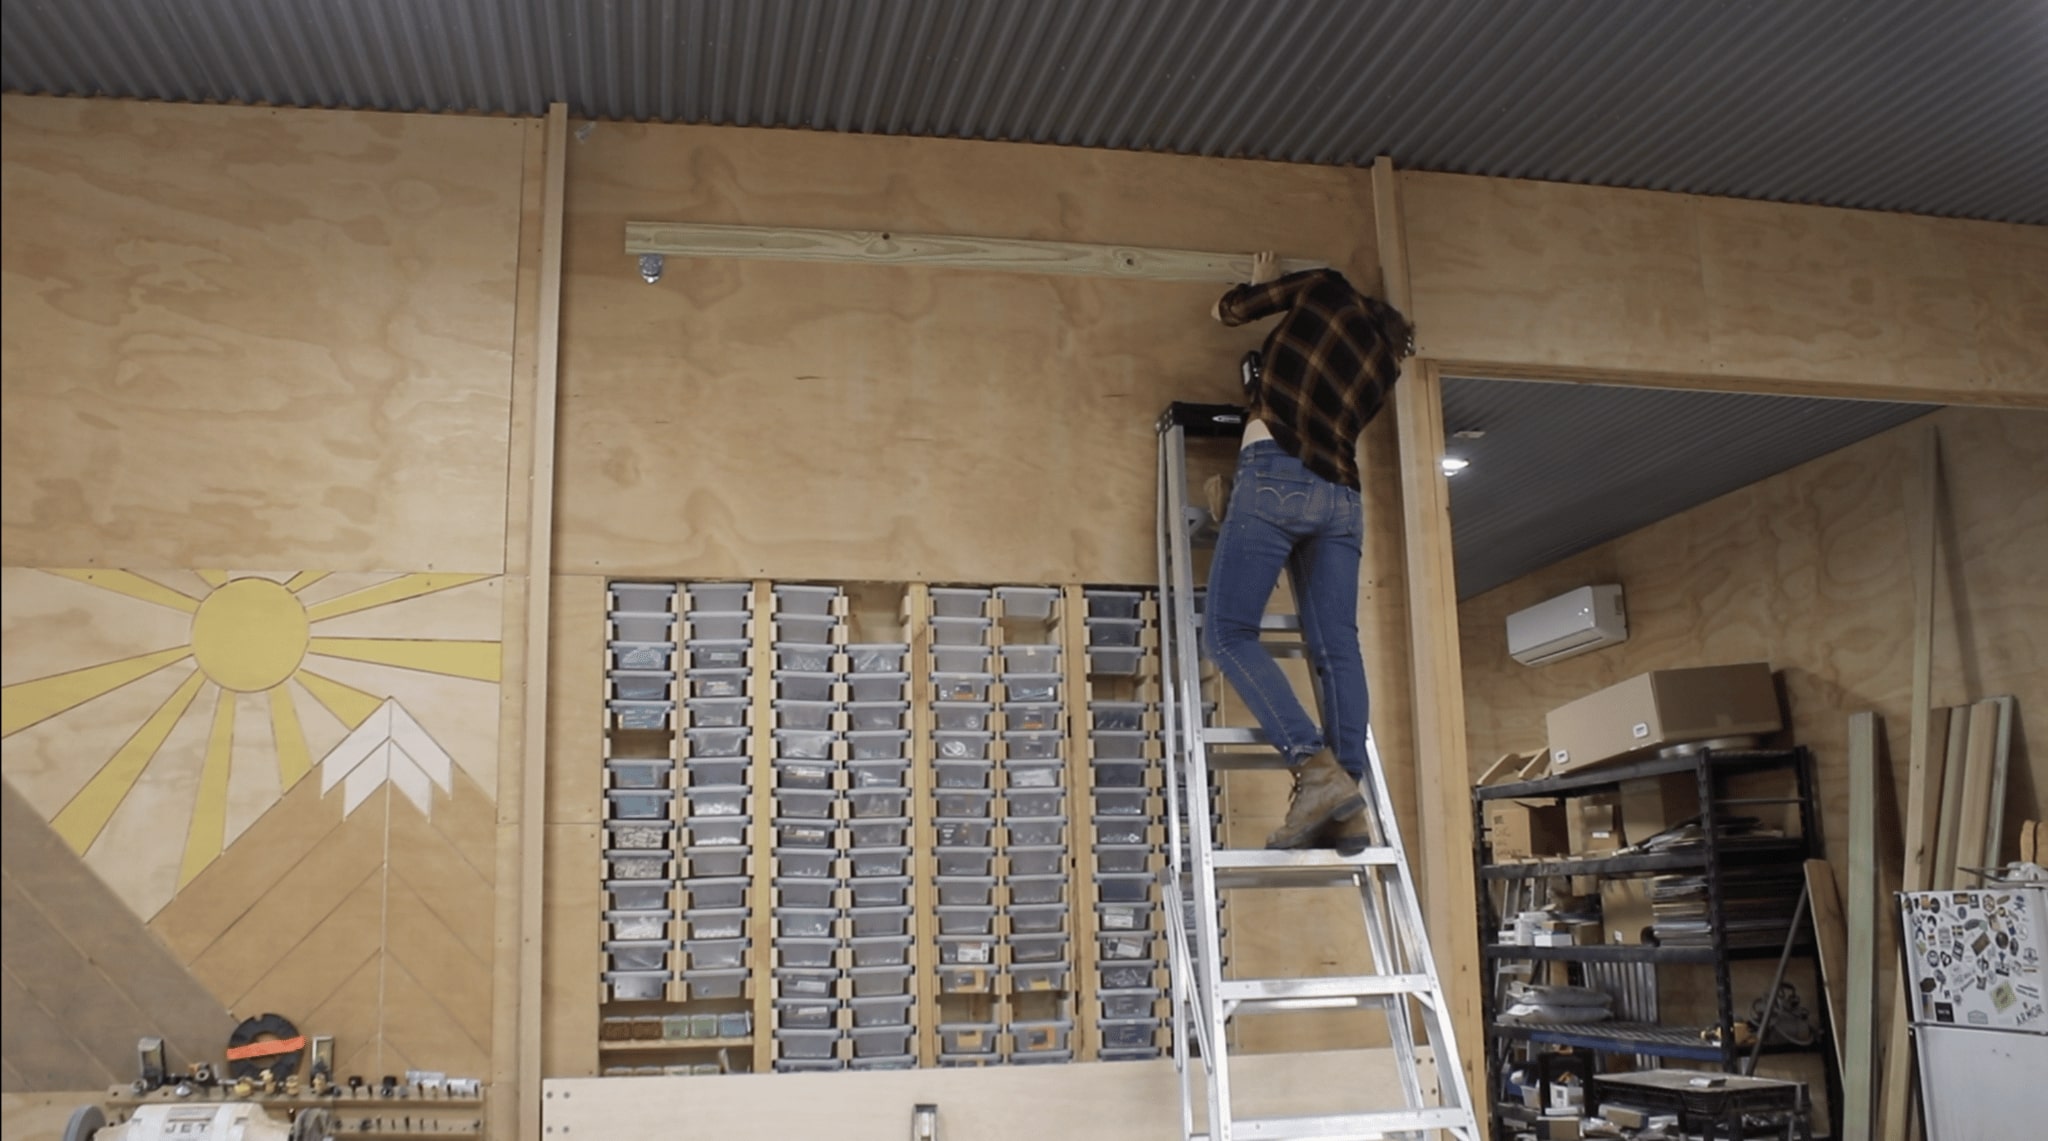
For a monitor, I truly desired to get anything off the shelf and ended up on the lookout at garage door tracks. They use to be low-cost, but like almost everything else, have skyrocketed in price. Instead, I resolved to make my have tracks from wood. I grabbed the hardest wooden I had in my shop that was long adequate, which was oak, and arranged it into an L. For the tracks, you certainly want some thing difficult for very long-phrase sturdiness. I connected it to the wall by holding it in place and throwing in a single brad nail. This will maintain it just extensive adequate for me to set a amount on it and plumb it up. I only experienced a 4’ amount in my store so I moved to the bottom, then best, and put a handful of brads as I straighten it out. As soon as it looked great, I came back with screws. I pre-drilled the holes to make certain the oak did not split. Next, I repeated the system by attaching the appropriate track the similar way as the still left.
Now that the tracks are attached, I moved to the major and hooked up some pulleys. These will be what the cable will go up to, prior to veering right to the hoist. I used some lags to go into my wall below. Then, even even though it is not required, I additional a ledger board…just to be harmless. A whole lot of the pressure on these pulleys will be vertical considering that it’s likely to be reaching down and pulling the climbing shelf upward. To directly oppose this force, I ran screws up into the ledger board. This is in addition to the lags that went into the wall.
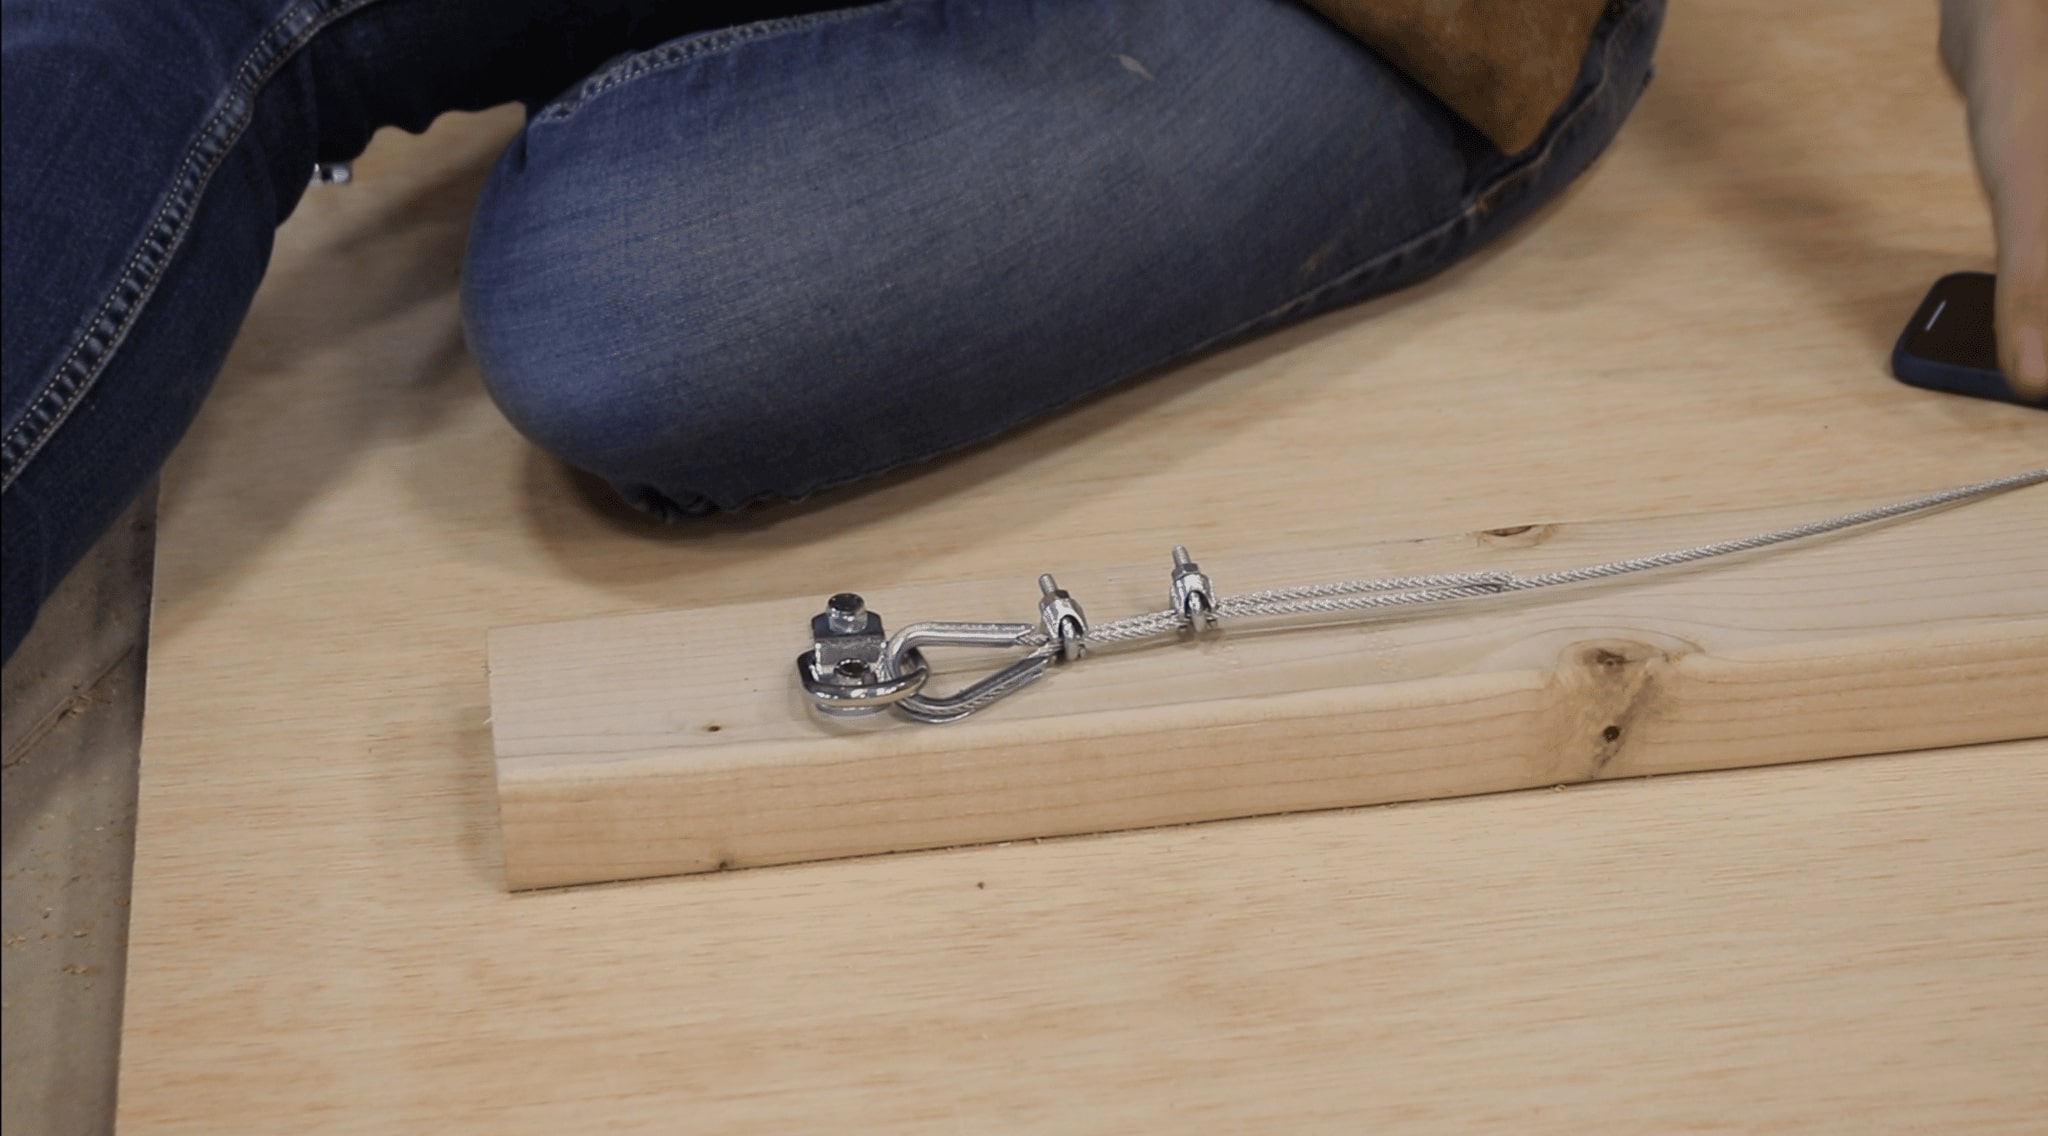
Transferring on, the upcoming step is to go back again to the shelf and attach a couple components. The initially is a thimble hooked onto the anchor point on the 2×4. This is made use of so the wire rope has a track it can be put in and then it can be looped back again on to by itself. To protected it, I applied what is referred to as “wired rope clamps”, which are tighten down on to both of those the guide in and lead out strains. I applied DAP’s Tank Bond Thread Locker on all of the project’s components that had a nut on it. I applied it to the threads ahead of I included the nuts. It a speedy-dry coating that produces a tight seal that absorbs shock and vibrations, preventing fasteners from unintentionally backing out. I truly like it mainly because the taken care of fasteners continue to be entirely adjustable, detachable and reusable if I have to change them in the long run. I use it on something that has vibration.
At this point I was capable to set the shelf in area. It’s big and awkward so aid was necessary for this phase. Jacob and I introduced it in from the base, a bit tilting it so the top rated roller would slip into the keep track of, then straightening it out vertical.
I fed the cable up to the pulleys from both equally anchors, but now desired to join them into 1. What I did in this article capabilities the same correct way that a window blind does. In the shelf established-up, the element I made use of is known as a turnbuckle. This allowed me to connect equally cables to one aspect, then shoot one cable from the other. Also, this gave me the capability to make compact, micro-changes later on as soon as all the things was put in and it was time to do closing tuning.
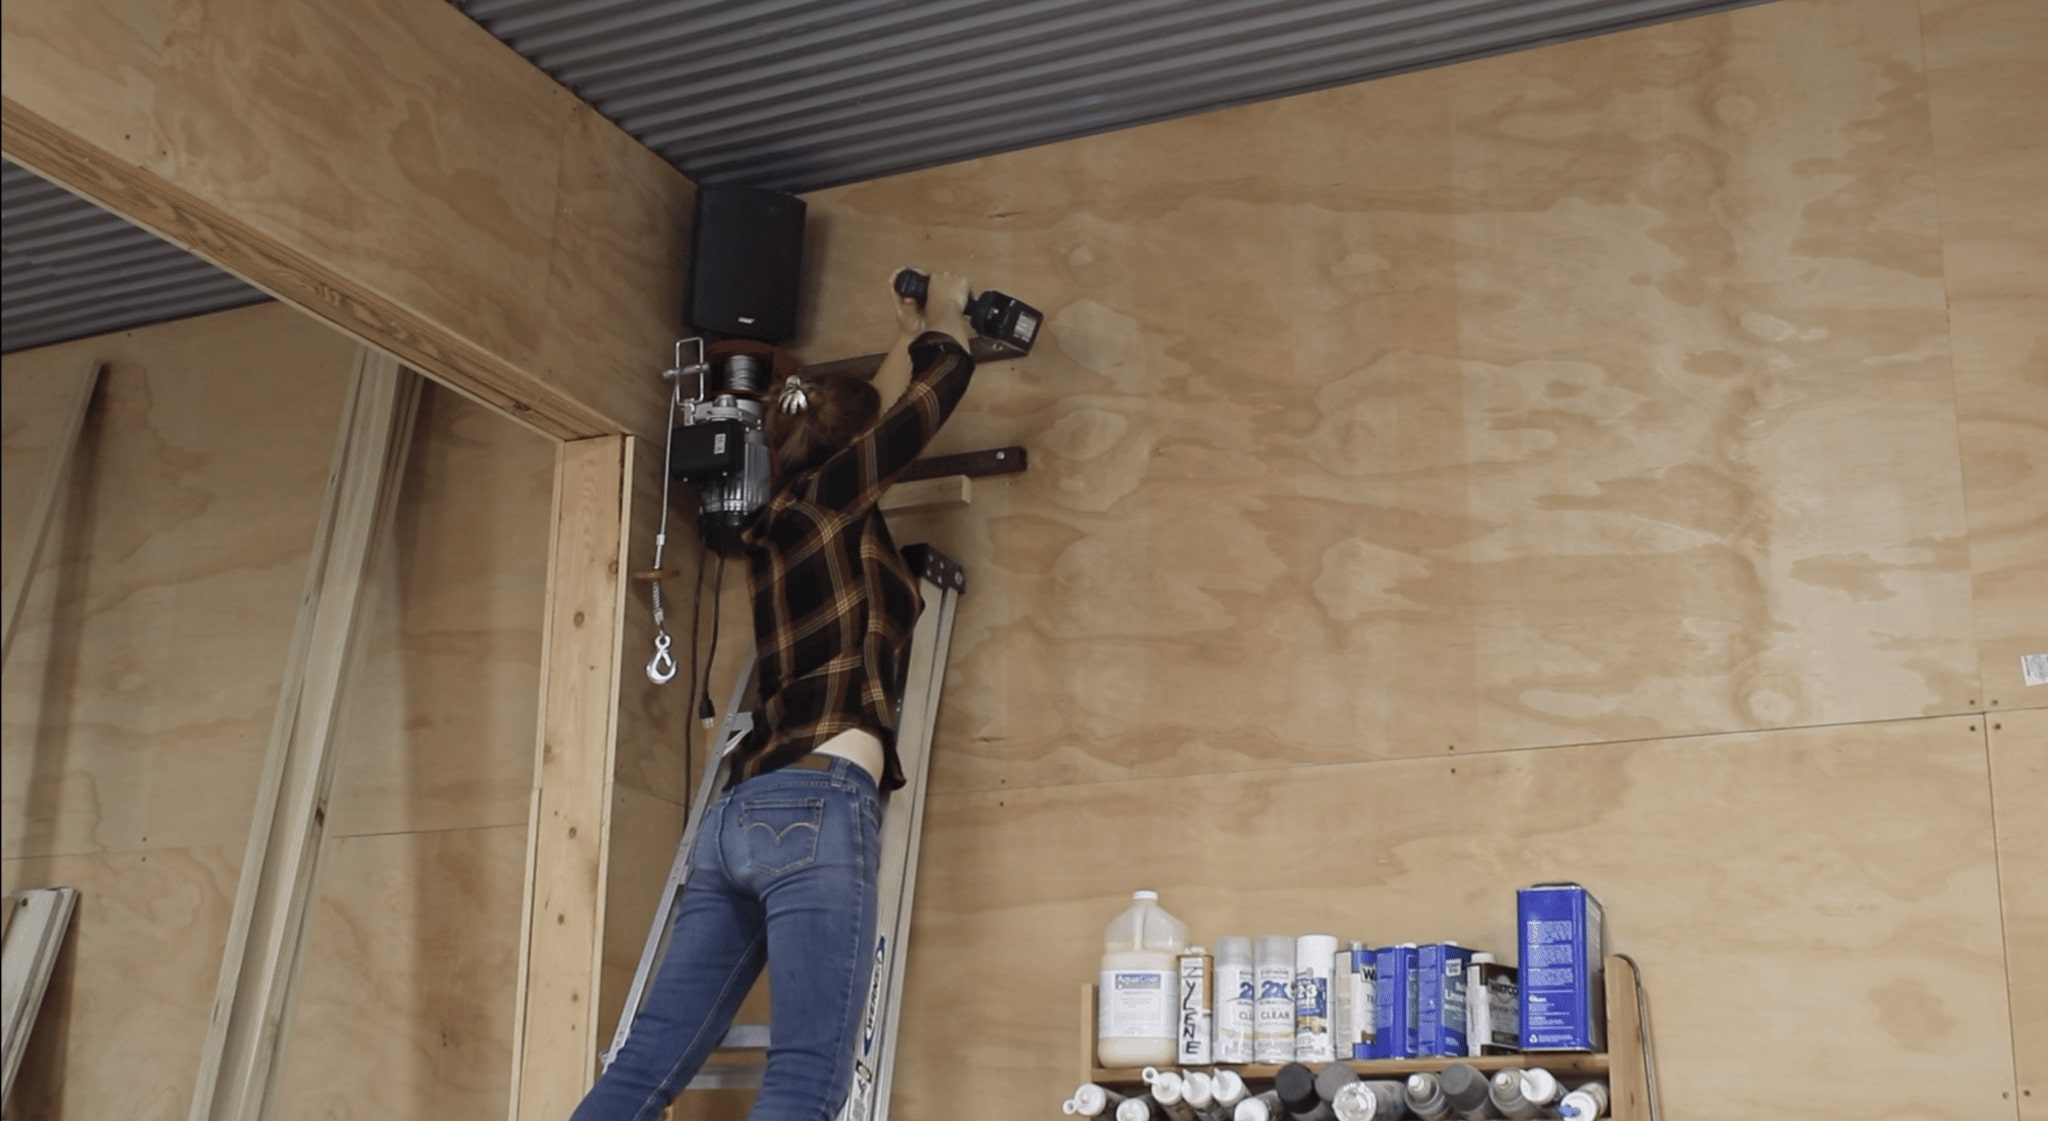
The last ingredient to increase is the hoist by itself. The mounting bracket is a easy Do it yourself 1 produced from some square tubing I experienced laying around. The holes are drilled in areas to match the stud site of the wall it will be mounted on to. The hoist is kind of weighty, but nothing at all unmanageable. I screwed a temporary 2×4 to the wall to give myself a resting shelf to established the hoist onto as I put lags into the studs.
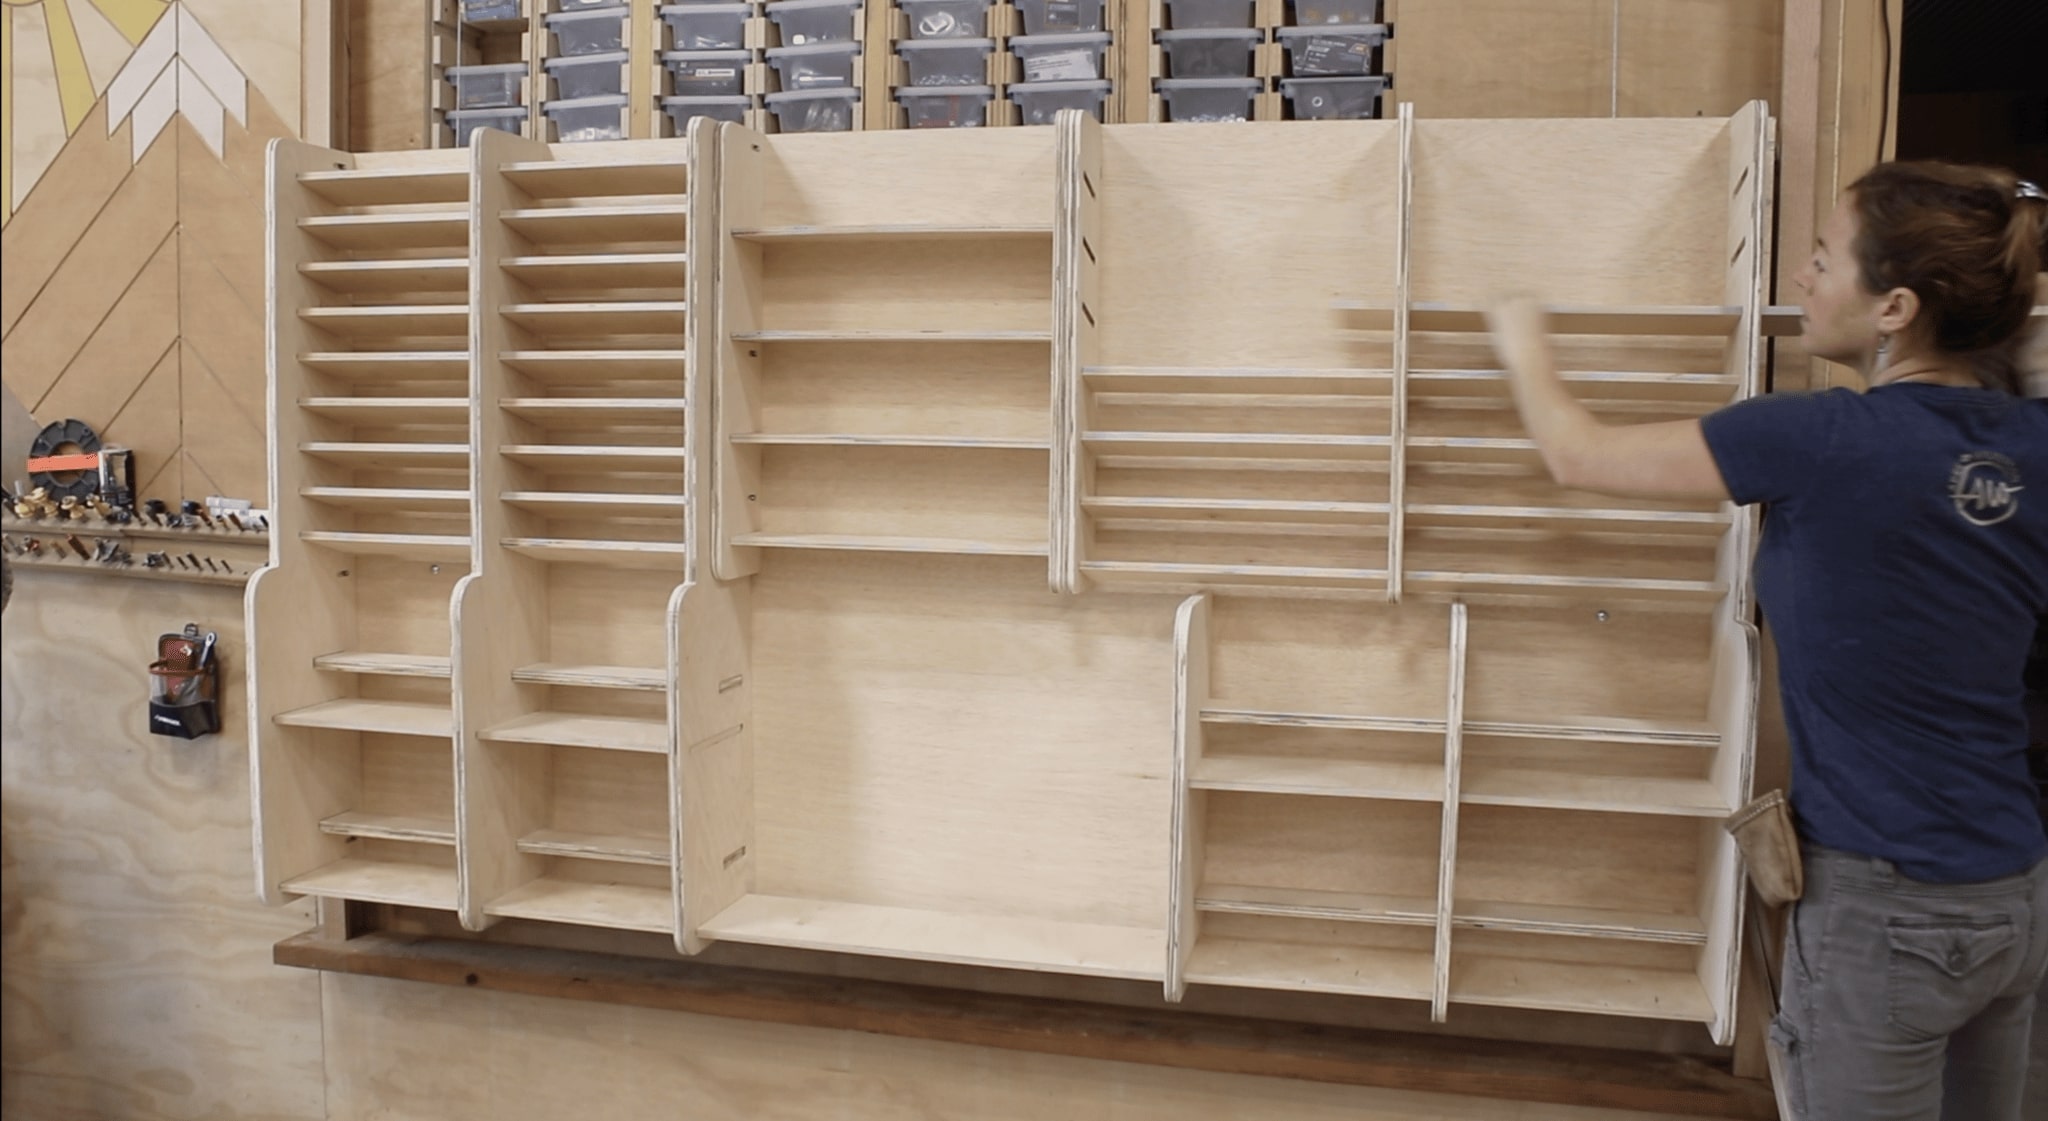
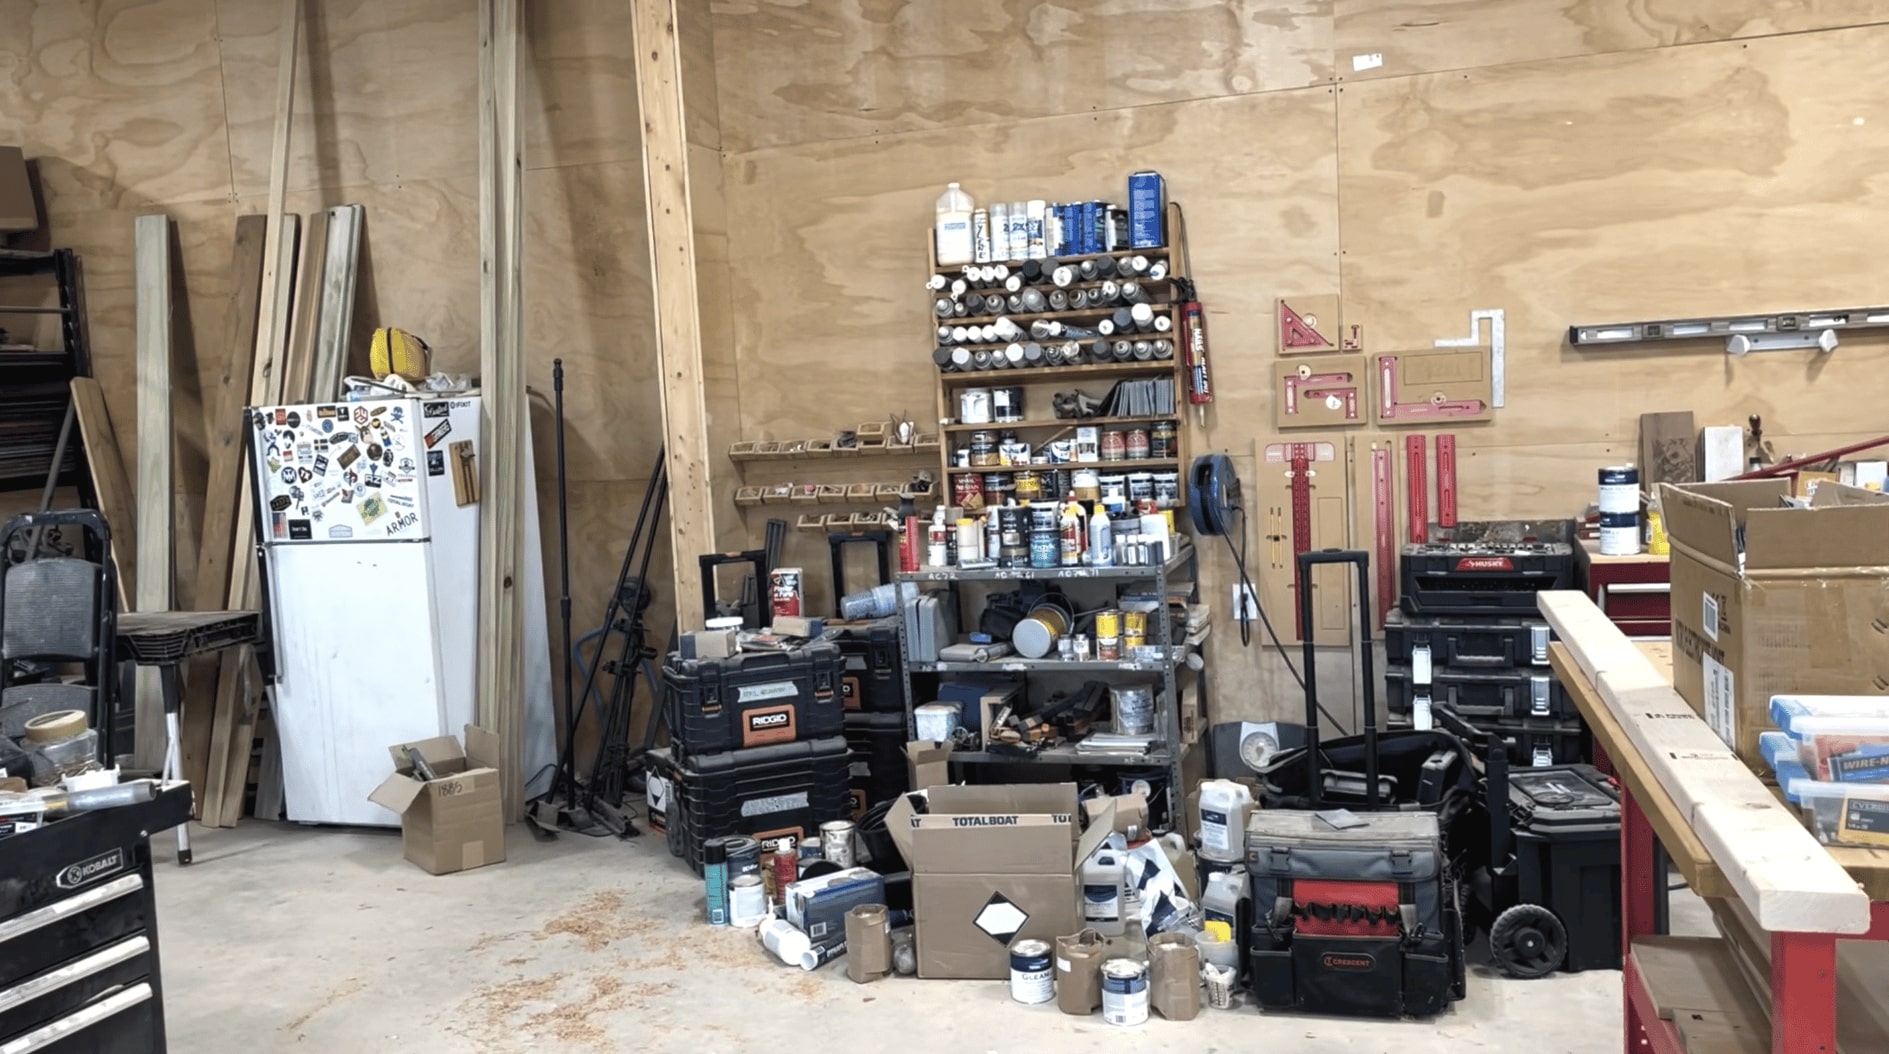
The very last step, I included the shelving wanted to keep all of the products and solutions I wished to retail outlet in this article. 1 of the coolest items about this job (I signify, in addition to the actuality that it is a growing shelf), is that you can customise it to hold just about everything. Just continue to keep on eye on the full excess weight of the objects that you are storing – it will have to have to be down below the capacity of the hoist and the parts you employed. The essential points to pay out consideration involve what the hoist is rated at and do all of the elements have the similar ranking. 1 weak url in a chain will induce it to fall short. I developed the mounting shelf as an ultimate shop storage program to organize spray paint cans, tubes of caulk, paint cans, and paint supplies this sort of as brushes.
Just before I ignore, a further detail I did was increase the pendent to be above near my shelf alternatively of up by my hoist. Now, if my shelf is lifted when I need to have to accessibility to my hardware, I can walk correct up to the wall and reduced it down. Then I can either hold it right here or I can elevate it again up to shop at the leading of my wall and hold the hardware rack uncovered. Cooooool!
Are you all set for the in advance of and soon after?! Verify it out!
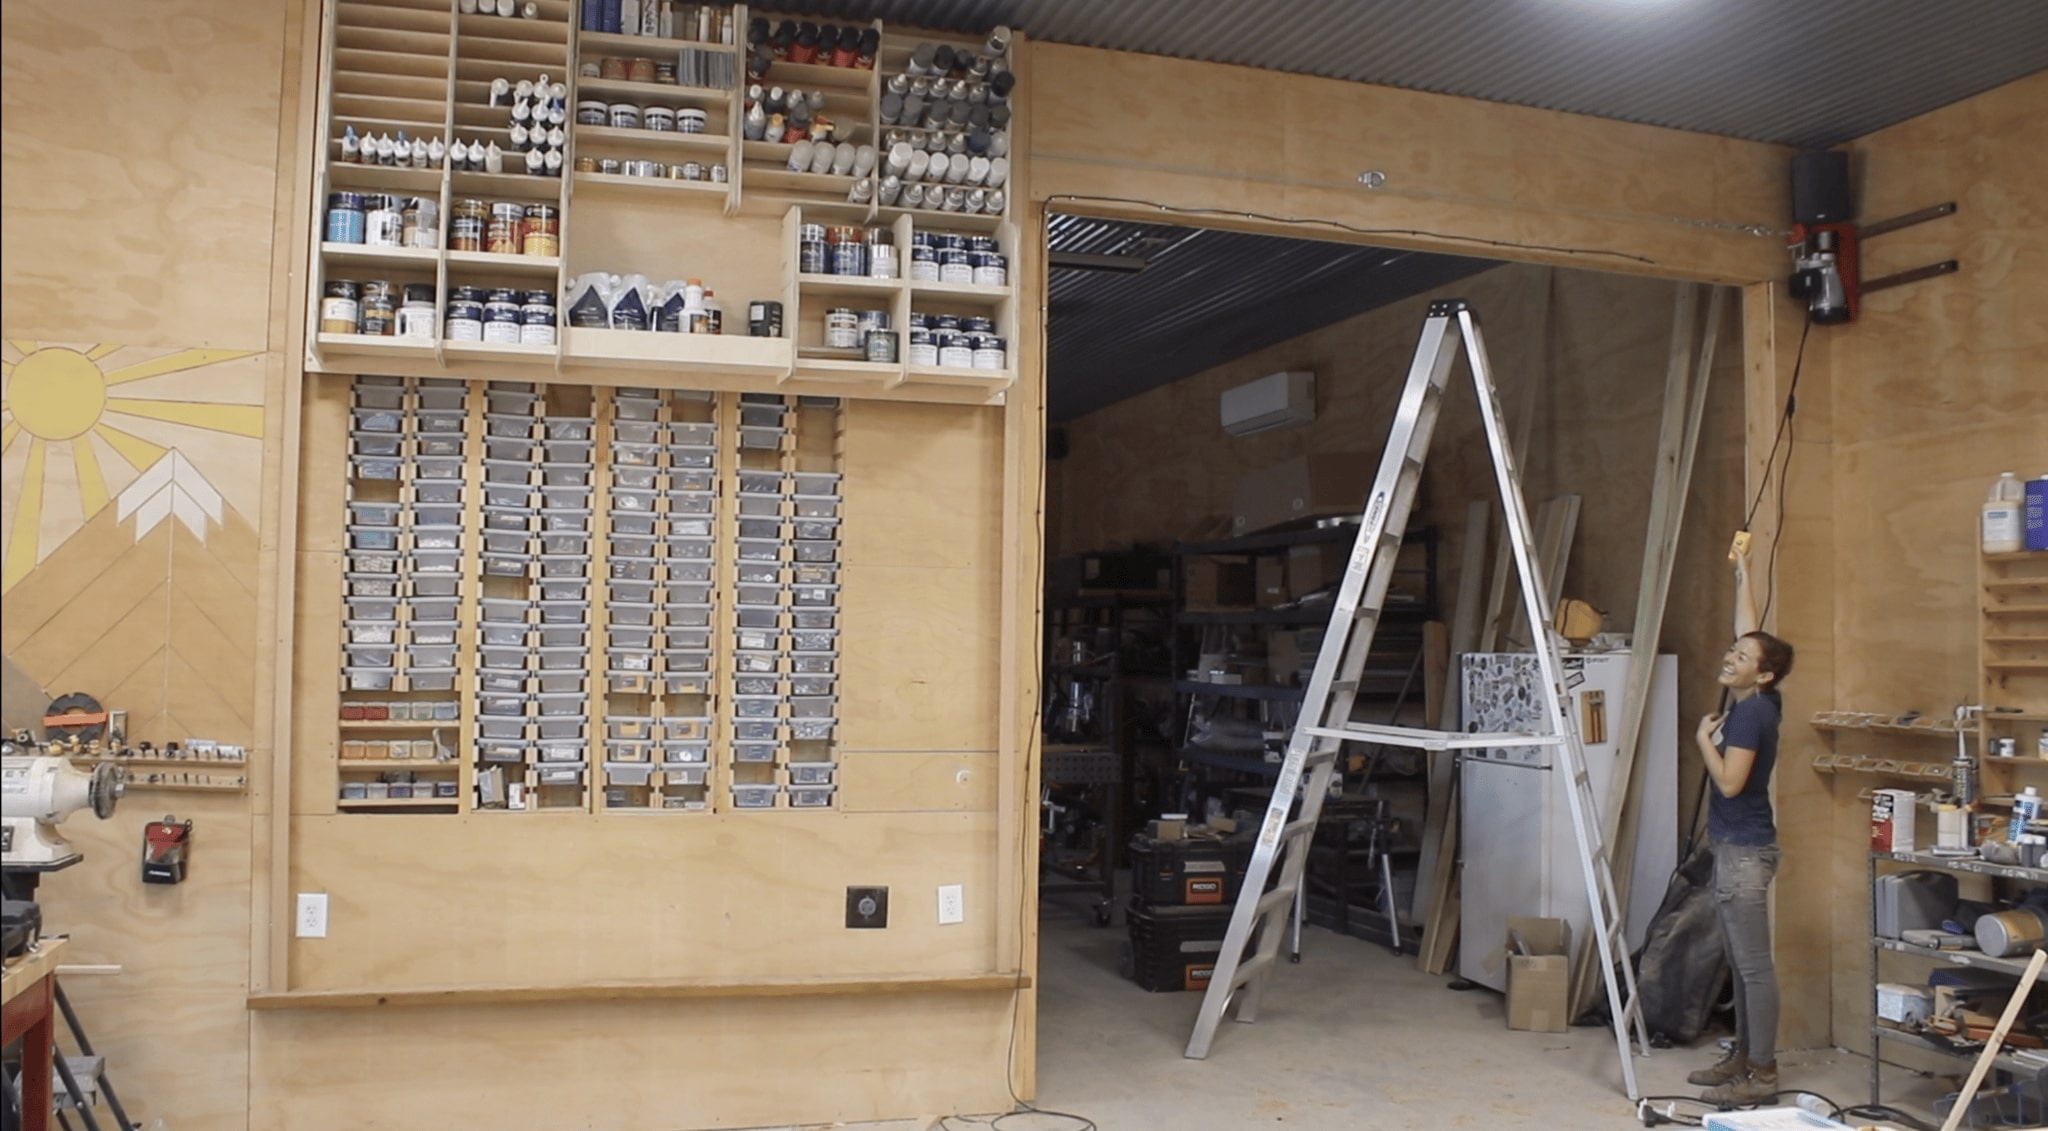
By the way, I have a web site and video clip on how I created this in-wall components rack if you want to do the same.
Really do not forget to check out out the Soaring Shelf Programs!
Interested in arranging your shop? If so, I have various workshop options to assistance you out! See y’all future time!


